

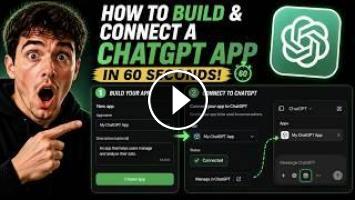
Welcome to a rapid-fire ProgrammingKnowledge2 tutorial! Today, we are looking at exactly how to create your own custom AI app and connect it directly to your workflow inside the ChatGPT interface. The best part? You do not need to be a hardcore developer, and you do not need to touch any complex code or external backend servers. We are doing this entirely through the native, no-code ChatGPT App Builder interface in under sixty seconds.
Whether you are organizing your cybersecurity study notes or automating your daily product analysis prompts, creating a custom app is the fastest way to save time in 2026. Here is the exact step-by-step setup for your quick workflow.
Step 1: Access the App Builder
Open up your ChatGPT web interface. On the left-hand sidebar, click on "Explore Apps" or "Explore GPTs" depending on your region's layout. In the top right corner, click the "Create" button. This launches the split-screen App Builder workspace.
Step 2: Configure Your App
Skip the conversational setup and click directly on the "Configure" tab for maximum control. Give your new app a specific name and a short description. Next, fill out the "Instructions" box. This is where you tell the app exactly how it should behave. Give it strict guidelines, set its tone of voice, and tell it exactly what tasks it is allowed to do.
Step 3: Connect Your Knowledge Files
Instead of typing the same context every single day, scroll down to the Knowledge section. Upload your reference PDFs, product wireframes, or text documents. By connecting these files, your app now has a permanent memory of your specific workflow that it can reference instantly.
Step 4: Connect Web Actions
If you want your app to talk to the outside world, scroll down to the bottom and click "Create New Action." Here, you can paste a simple web schema to connect your app directly to external services like your calendar, weather updates, or basic webhooks without needing a massive server infrastructure.
Step 5: Publish and Pin
Once your app is configured, click the "Save" or "Publish" button in the top right. You can keep it private for yourself, share it with your workspace team, or publish it to the global store. Finally, pin it to your sidebar so your custom AI assistant is always exactly one click away.
You have just successfully created and connected a custom AI app inside ChatGPT without writing a single line of backend code!
If you want the full, deep-dive walkthrough on configuring advanced actions, check out the related long-form video linked down below. Do not forget to hit the LIKE button and SUBSCRIBE to ProgrammingKnowledge2 for more lightning-fast tech tutorials, software engineering tips, and AI workflow optimization guides in 2026! Let us know what app you built in the comments section!
Hashtags
#ChatGPT #CustomGPT #ProgrammingKnowledge2 #TechTutorial #Coding2026 #NoCodeApp #DeveloperTools #AIProgramming #WorkflowAutomation #ProductivityTips #OpenAITutorial #TechShorts
SEO Tags
Create ChatGPT app 2026, connect app in ChatGPT quick guide, ChatGPT GPT builder tutorial, no code ChatGPT app setup, build custom GPT fast, how to create an AI app in 60 seconds, B.Tech CSE quick tech tips, ProgrammingKnowledge2 shorts, AI software engineering fast tutorial, ChatGPT actions setup without code, automate workflow ChatGPT custom app, ChatGPT explore apps menu guide, ChatGPT instructions configuration.
Whether you are organizing your cybersecurity study notes or automating your daily product analysis prompts, creating a custom app is the fastest way to save time in 2026. Here is the exact step-by-step setup for your quick workflow.
Step 1: Access the App Builder
Open up your ChatGPT web interface. On the left-hand sidebar, click on "Explore Apps" or "Explore GPTs" depending on your region's layout. In the top right corner, click the "Create" button. This launches the split-screen App Builder workspace.
Step 2: Configure Your App
Skip the conversational setup and click directly on the "Configure" tab for maximum control. Give your new app a specific name and a short description. Next, fill out the "Instructions" box. This is where you tell the app exactly how it should behave. Give it strict guidelines, set its tone of voice, and tell it exactly what tasks it is allowed to do.
Step 3: Connect Your Knowledge Files
Instead of typing the same context every single day, scroll down to the Knowledge section. Upload your reference PDFs, product wireframes, or text documents. By connecting these files, your app now has a permanent memory of your specific workflow that it can reference instantly.
Step 4: Connect Web Actions
If you want your app to talk to the outside world, scroll down to the bottom and click "Create New Action." Here, you can paste a simple web schema to connect your app directly to external services like your calendar, weather updates, or basic webhooks without needing a massive server infrastructure.
Step 5: Publish and Pin
Once your app is configured, click the "Save" or "Publish" button in the top right. You can keep it private for yourself, share it with your workspace team, or publish it to the global store. Finally, pin it to your sidebar so your custom AI assistant is always exactly one click away.
You have just successfully created and connected a custom AI app inside ChatGPT without writing a single line of backend code!
If you want the full, deep-dive walkthrough on configuring advanced actions, check out the related long-form video linked down below. Do not forget to hit the LIKE button and SUBSCRIBE to ProgrammingKnowledge2 for more lightning-fast tech tutorials, software engineering tips, and AI workflow optimization guides in 2026! Let us know what app you built in the comments section!
Hashtags
#ChatGPT #CustomGPT #ProgrammingKnowledge2 #TechTutorial #Coding2026 #NoCodeApp #DeveloperTools #AIProgramming #WorkflowAutomation #ProductivityTips #OpenAITutorial #TechShorts
SEO Tags
Create ChatGPT app 2026, connect app in ChatGPT quick guide, ChatGPT GPT builder tutorial, no code ChatGPT app setup, build custom GPT fast, how to create an AI app in 60 seconds, B.Tech CSE quick tech tips, ProgrammingKnowledge2 shorts, AI software engineering fast tutorial, ChatGPT actions setup without code, automate workflow ChatGPT custom app, ChatGPT explore apps menu guide, ChatGPT instructions configuration.
- Категория
- Бесплатные курсы

Комментариев нет.
Следующее
Auto
-
02:01

How To Connect Your GitHub Repository To ChatGPT In 2026 For Fast And Seamless Code Analysis!!
-
17:00
Palworld 1.0 - How to Farm INFINITE Resources FAST - 41 OP Farming Tips & New Best Base Setup Guide!
-
03:59
Facebook Affiliate Marketing Kaise Kare 2026| online earning app 2026| best earning app| earning app
-
08:20
Create Long AI Videos 100% FREE & Get Monetized Fast (2026 Guide)
-
10:42
Easy Coffee Mug Designs That Make Money Fast Etsy + Canva | Create Custom Mugs to Sell on Etsy
-
12:50
EarnKaro App Se Paise Kaise Kamaye | EarnKaro App Se Affiliate Marketing Kaise Kare | EarnKaro App
-
25:45
Setup ChatGPT Ads with Claude Code (Full Setup Guide)
-
08:52
Connect ChatGPT (And Other AI Platforms) to Evernote & New Date Feature
-
00:26
Easy Wi-Fi Setup: Connect MANGOAL Camera to App Instantly! #shorts #dashcam
-
06:56
Instagram Affiliate Programs Connect Kaise Kare | How To Connect Instagram Affiliate Programs
-
05:33

ЗАРАБОТОК В ИНТЕРНЕТЕ | КРУТАЯ СХЕМА | FUNPAY
-
08:12

Пассивный Заработок 1000Р в День в Интернете на Телефоне Без Вложений
-
06:43

Как ЗАРАБОТАТЬ ШКОЛЬНИКУ в ИНТЕРНЕТЕ? Самые Легкие Способы Заработка
-
07:05

ЗАРАБОТОК В ИНТЕРНЕТЕ 2023 | Реальный заработок в интернете с вложением | Как заработать в интернете
-
05:49

ЗАРАБОТОК В ИНТЕРНЕТЕ 2023 | Реальный Заработок В Интернете С Вложением. Как Заработать В Интернете?
-
04:28

Схема заработка 2023 ! Зарабатываем в интернете онлайн сидя дома ! Заработок денег ! Деньги легко !
-
05:33

ЗАРАБОТОК В ИНТЕРНЕТЕ | КРУТАЯ СХЕМА | FUNPAY
-
06:43

Как ЗАРАБОТАТЬ ШКОЛЬНИКУ в ИНТЕРНЕТЕ? Самые Легкие Способы Заработка
-
14:53

Показываю Как Зарабатывать Деньги - Заработок В Интернете 2023 Рабочая Схема Для Заработка
-
14:12

Большой Заработок В Интернете С Выводом Рабочая Схема Заработка
 Загрузка...