

Welcome to a rapid-fire ProgrammingKnowledge2 tutorial! In 2026, you no longer need to manually copy and paste thousands of lines of code or download massive ZIP files to get AI assistance on your software projects. OpenAI has officially launched the native GitHub connector for ChatGPT, allowing the artificial intelligence to securely pull live data, read README files, and analyze your entire repository architecture in real-time. Whether you are debugging a complex pull request or asking the AI to summarize an entire monolithic codebase, connecting GitHub directly to your ChatGPT workspace is the ultimate developer productivity hack.
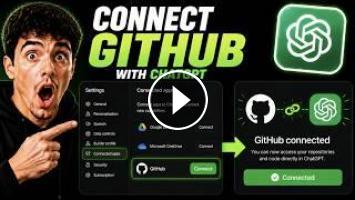
Here is the exact step-by-step setup to connect and authorize your GitHub repositories in under sixty seconds.
Step 1: Open Your ChatGPT App Directory
Log into your ChatGPT web interface. Click on your profile icon in the top right corner to open the main dropdown menu, and select "Settings". Once you are in the Settings dashboard, navigate to the "Apps" tab. This is where all native integrations live in the 2026 ecosystem.
Step 2: Find and Connect GitHub
Inside the Apps menu, click on "Explore Apps" and locate GitHub in the directory. Click the "Connect" button.
Step 3: Authorize on GitHub
You will be immediately redirected to the official GitHub website. If you are not already signed in, you will need to log into your GitHub account. Once authenticated, GitHub will display an authorization screen for the ChatGPT connector app. Here, you have a crucial choice for your data privacy: you can choose to grant the AI access to "All repositories" or you can restrict its access to "Only select repositories". For maximum security, we highly recommend selecting only the specific repositories you are actively working on.
Step 4: Sync and Query
After you click install and authorize, you will be redirected back to ChatGPT. The platform may ask you which repositories you want to actively sync for improved speed and indexing quality. Once the sync is complete, your setup is done! You can now type a prompt like, "Explain the routing logic in my frontend repository," and ChatGPT will autonomously search your live codebase, read the files, and provide an answer with exact, clickable citations pointing straight to your GitHub lines of code.
You have just successfully integrated your live development environment with your AI workspace! Please remember that this native integration is strictly read-only. ChatGPT can analyze your code to perfection, but it cannot execute destructive writes, push commits, or merge pull requests on your behalf without using the separate Codex product.
Do not forget to hit the LIKE button and SUBSCRIBE to ProgrammingKnowledge2 for more lightning-fast tech tutorials, software engineering workflow tips, and AI productivity guides in 2026! What repository are you connecting to your AI first? Let us know in the comments section below!
Hashtags
#ChatGPT #GitHub #ProgrammingKnowledge2 #TechTutorial #Coding2026 #SoftwareEngineering #DeveloperTools #AIProgramming #WorkflowAutomation #ProductivityTips #OpenAITutorial #TechShorts #CodeAnalysis
SEO Tags
Connect GitHub to ChatGPT 2026, ChatGPT GitHub integration tutorial, how to link GitHub repository to ChatGPT, ChatGPT read GitHub code, authorize ChatGPT GitHub app, sync GitHub with OpenAI, live code analysis ChatGPT 2026, B.Tech CSE quick tech tips, ProgrammingKnowledge2 shorts, AI software engineering fast tutorial, GitHub repository AI search, ChatGPT apps directory tutorial, read only GitHub access AI.
Here is the exact step-by-step setup to connect and authorize your GitHub repositories in under sixty seconds.
Step 1: Open Your ChatGPT App Directory
Log into your ChatGPT web interface. Click on your profile icon in the top right corner to open the main dropdown menu, and select "Settings". Once you are in the Settings dashboard, navigate to the "Apps" tab. This is where all native integrations live in the 2026 ecosystem.
Step 2: Find and Connect GitHub
Inside the Apps menu, click on "Explore Apps" and locate GitHub in the directory. Click the "Connect" button.
Step 3: Authorize on GitHub
You will be immediately redirected to the official GitHub website. If you are not already signed in, you will need to log into your GitHub account. Once authenticated, GitHub will display an authorization screen for the ChatGPT connector app. Here, you have a crucial choice for your data privacy: you can choose to grant the AI access to "All repositories" or you can restrict its access to "Only select repositories". For maximum security, we highly recommend selecting only the specific repositories you are actively working on.
Step 4: Sync and Query
After you click install and authorize, you will be redirected back to ChatGPT. The platform may ask you which repositories you want to actively sync for improved speed and indexing quality. Once the sync is complete, your setup is done! You can now type a prompt like, "Explain the routing logic in my frontend repository," and ChatGPT will autonomously search your live codebase, read the files, and provide an answer with exact, clickable citations pointing straight to your GitHub lines of code.
You have just successfully integrated your live development environment with your AI workspace! Please remember that this native integration is strictly read-only. ChatGPT can analyze your code to perfection, but it cannot execute destructive writes, push commits, or merge pull requests on your behalf without using the separate Codex product.
Do not forget to hit the LIKE button and SUBSCRIBE to ProgrammingKnowledge2 for more lightning-fast tech tutorials, software engineering workflow tips, and AI productivity guides in 2026! What repository are you connecting to your AI first? Let us know in the comments section below!
Hashtags
#ChatGPT #GitHub #ProgrammingKnowledge2 #TechTutorial #Coding2026 #SoftwareEngineering #DeveloperTools #AIProgramming #WorkflowAutomation #ProductivityTips #OpenAITutorial #TechShorts #CodeAnalysis
SEO Tags
Connect GitHub to ChatGPT 2026, ChatGPT GitHub integration tutorial, how to link GitHub repository to ChatGPT, ChatGPT read GitHub code, authorize ChatGPT GitHub app, sync GitHub with OpenAI, live code analysis ChatGPT 2026, B.Tech CSE quick tech tips, ProgrammingKnowledge2 shorts, AI software engineering fast tutorial, GitHub repository AI search, ChatGPT apps directory tutorial, read only GitHub access AI.
- Категория
- Бесплатные курсы

Комментариев нет.
Следующее
Auto
-
09:44

AutoCAD vs GIS: Bridging CAD and GIS Integration, Analysis, and Industry Standards
-
00:45
Seamless Coop в Dark Souls 2 уже скоро! #darksouls #darksouls2 #соулслайк
-
25:38
Error Analysis Explained Simply | Error Analysis Complete One Shot Part-2 | NEET 2027 |Spark Academy
-
05:50
Best AI Tools for Data Analysis SPSS, Claude and ChatGPT which one is accurate
-
11:01
Claude Code Just Made Automating Your YouTube Growth EASY! (How To Connect Claude AI to YouTube)
-
19:47
Drainage and Streams Frequency Mapping and Analysis in ArcGIS Environment
-
08:52
Connect ChatGPT (And Other AI Platforms) to Evernote & New Date Feature
-
31:32
ChatGPT Features for Excel to Improve Your Data Analysis Skills - AI Essential Beginner Course
-
06:56
Instagram Affiliate Programs Connect Kaise Kare | How To Connect Instagram Affiliate Programs
-
01:42
How To Create And Connect A Custom App In ChatGPT 2026: Fast No Code Setup Guide For Beginners
-
05:33

ЗАРАБОТОК В ИНТЕРНЕТЕ | КРУТАЯ СХЕМА | FUNPAY
-
08:12

Пассивный Заработок 1000Р в День в Интернете на Телефоне Без Вложений
-
06:43

Как ЗАРАБОТАТЬ ШКОЛЬНИКУ в ИНТЕРНЕТЕ? Самые Легкие Способы Заработка
-
07:05

ЗАРАБОТОК В ИНТЕРНЕТЕ 2023 | Реальный заработок в интернете с вложением | Как заработать в интернете
-
05:49

ЗАРАБОТОК В ИНТЕРНЕТЕ 2023 | Реальный Заработок В Интернете С Вложением. Как Заработать В Интернете?
-
04:28

Схема заработка 2023 ! Зарабатываем в интернете онлайн сидя дома ! Заработок денег ! Деньги легко !
-
05:33

ЗАРАБОТОК В ИНТЕРНЕТЕ | КРУТАЯ СХЕМА | FUNPAY
-
06:43

Как ЗАРАБОТАТЬ ШКОЛЬНИКУ в ИНТЕРНЕТЕ? Самые Легкие Способы Заработка
-
14:53

Показываю Как Зарабатывать Деньги - Заработок В Интернете 2023 Рабочая Схема Для Заработка
-
14:12

Большой Заработок В Интернете С Выводом Рабочая Схема Заработка
 Загрузка...