

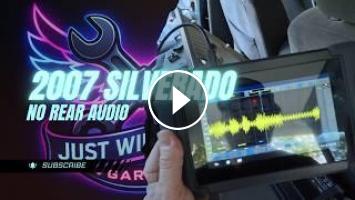
We diagnose a total loss of audio from the rear speakers on a 2007 Chevy Silverado Classic. If you own a 1999–2007 GM truck or SUV and lose audio in the rear channels, or your scan tool pulls up radio fault codes B1045 and B1055, this video breaks down exactly how to find the root cause.
Instead of guessing and pulling out the radio head unit, we start with a full vehicle system scan using our Youcanic scan tool to look at the radio configuration. We discover active codes for Audio Output 3 and 4 Left/Right Rear Circuits. We step through the diagnostic logic path to verify that the radio amplifier circuit is intact and actively sending signal to the doors.
Watch how we pull the door panels and verify the circuits using two separate methods: checking for fluctuating AC audio voltage with a digital multimeter, and using an oscilloscope to monitor the frequency amplitude shifts as the volume changes. After proving the truck's wiring harness and head unit are working flawlessly, we condemn the old factory 8-ohm speakers. We walk through a clean upgrade to a set of Kenwood KFC-1666S 6.5-inch 2-way speakers, and discuss why matching impedance matters when dealing with factory GM sound systems.
0:00 - Symptom Breakdown: 2007 Silverado Classic Rear Speaker Audio Issue
0:06 - Setting the Diagnostic Plan: Head Unit vs. Blown Speakers
0:12 - Mobile Tool Setup: Using the Youcanic Scan Tool and Vevor Kits
0:39 - Executing a Full Network Scan to Map out Radio Modules
0:47 - Analyzing Fault Codes: Deep Dive into DTC B1045 & B1055
0:54 - Reviewing Radio Build Strategy: Non-Bose Factory Amp Architecture
1:13 - Testing the Radio Controls: Front and Rear Fader Adjustments
1:56 - Step-by-Step Rear Door Panel Removal Walkthrough
2:23 - Accessing the Factory Speaker Connector Housing
2:34 - Outlining Three Separate Diagnostic Methods for Audio Signals
2:43 - Method 1: Testing for Audio Signal AC Voltage on a Multimeter
2:54 - Method 2: Testing the Speaker Component via the 9V Battery Trick
3:09 - Backprobing the Audio Pins to Verify Live Head Unit Output
3:19 - Reading the Meter: Monitoring AC Voltage Changes with the Music
3:38 - Method 3: Setting up the Oscilloscope to Trace Audio Waveforms
3:51 - Waveform Analysis: Tracking Audio Frequency Amplitude and Volume
4:10 - Upgrading the Bay: Unboxing the Kenwood KFC-1666S 2-Way Speakers
4:24 - Technical Discussion: 8-Ohm Factory vs. 4-Ohm Aftermarket Impedance
4:38 - Installing the Speaker Units into the Factory GM Adapters
4:59 - Post-Repair Audio Check: Verifying Sound Output Left and Right
5:10 - Clearing Radio Codes and Final Network Module Audit
5:16 - Outro & Wrap-Up
If you want to stop guessing on electrical faults and learn how to track down problems using real circuit parameters, make sure to like, drop a comment with your own vehicle speaker upgrades, and subscribe to support the bay!
#justwingingitgarage #youcanic #carrepair #micsig #CarAudioRepair #ElectricalTroubleshooting
Instead of guessing and pulling out the radio head unit, we start with a full vehicle system scan using our Youcanic scan tool to look at the radio configuration. We discover active codes for Audio Output 3 and 4 Left/Right Rear Circuits. We step through the diagnostic logic path to verify that the radio amplifier circuit is intact and actively sending signal to the doors.
Watch how we pull the door panels and verify the circuits using two separate methods: checking for fluctuating AC audio voltage with a digital multimeter, and using an oscilloscope to monitor the frequency amplitude shifts as the volume changes. After proving the truck's wiring harness and head unit are working flawlessly, we condemn the old factory 8-ohm speakers. We walk through a clean upgrade to a set of Kenwood KFC-1666S 6.5-inch 2-way speakers, and discuss why matching impedance matters when dealing with factory GM sound systems.
0:00 - Symptom Breakdown: 2007 Silverado Classic Rear Speaker Audio Issue
0:06 - Setting the Diagnostic Plan: Head Unit vs. Blown Speakers
0:12 - Mobile Tool Setup: Using the Youcanic Scan Tool and Vevor Kits
0:39 - Executing a Full Network Scan to Map out Radio Modules
0:47 - Analyzing Fault Codes: Deep Dive into DTC B1045 & B1055
0:54 - Reviewing Radio Build Strategy: Non-Bose Factory Amp Architecture
1:13 - Testing the Radio Controls: Front and Rear Fader Adjustments
1:56 - Step-by-Step Rear Door Panel Removal Walkthrough
2:23 - Accessing the Factory Speaker Connector Housing
2:34 - Outlining Three Separate Diagnostic Methods for Audio Signals
2:43 - Method 1: Testing for Audio Signal AC Voltage on a Multimeter
2:54 - Method 2: Testing the Speaker Component via the 9V Battery Trick
3:09 - Backprobing the Audio Pins to Verify Live Head Unit Output
3:19 - Reading the Meter: Monitoring AC Voltage Changes with the Music
3:38 - Method 3: Setting up the Oscilloscope to Trace Audio Waveforms
3:51 - Waveform Analysis: Tracking Audio Frequency Amplitude and Volume
4:10 - Upgrading the Bay: Unboxing the Kenwood KFC-1666S 2-Way Speakers
4:24 - Technical Discussion: 8-Ohm Factory vs. 4-Ohm Aftermarket Impedance
4:38 - Installing the Speaker Units into the Factory GM Adapters
4:59 - Post-Repair Audio Check: Verifying Sound Output Left and Right
5:10 - Clearing Radio Codes and Final Network Module Audit
5:16 - Outro & Wrap-Up
If you want to stop guessing on electrical faults and learn how to track down problems using real circuit parameters, make sure to like, drop a comment with your own vehicle speaker upgrades, and subscribe to support the bay!
#justwingingitgarage #youcanic #carrepair #micsig #CarAudioRepair #ElectricalTroubleshooting
- Категория
- Схемы по заработку в интернете

Комментариев нет.
Следующее
Auto
-
07:33

This Changed My Rear Delt Training Forever | Biomechanics Explained
-
08:12
Nissan Qashqai Heater Fan Not Working? Blower Motor Repair
-
00:28
shorts - Semi truck with a 53 ft dryvan trailer was caught under the bridge | #truck #dryvan
-
04:35
How IT Teams Use Flowcharts to Document Troubleshooting Processes | EdrawMax Tutorial
-
02:15
What We Wish You Knew About Working (or not working) With a Disability
-
19:12
Changing the REAR Brake pads and Rotors on the RAM Promaster, Easy Step by STEP
-
05:59
▶️ Which of These Best Smart Speakers with Voice Control 2026 Is Right For You?
-
08:01
Top 5 Edifier Speakers Ranked 2026 — Which One Should You Actually Buy?
-
02:50
How to Fix Rear Heated Seats on Dodge Ram – Fuse Diagram & Replacement (2013-2018)
-
08:28
Maytag Bravo Not Spinning - Don't Call A Repair Man
-
05:33

ЗАРАБОТОК В ИНТЕРНЕТЕ | КРУТАЯ СХЕМА | FUNPAY
-
08:12

Пассивный Заработок 1000Р в День в Интернете на Телефоне Без Вложений
-
06:43

Как ЗАРАБОТАТЬ ШКОЛЬНИКУ в ИНТЕРНЕТЕ? Самые Легкие Способы Заработка
-
07:05

ЗАРАБОТОК В ИНТЕРНЕТЕ 2023 | Реальный заработок в интернете с вложением | Как заработать в интернете
-
05:49

ЗАРАБОТОК В ИНТЕРНЕТЕ 2023 | Реальный Заработок В Интернете С Вложением. Как Заработать В Интернете?
-
04:28

Схема заработка 2023 ! Зарабатываем в интернете онлайн сидя дома ! Заработок денег ! Деньги легко !
-
05:33

ЗАРАБОТОК В ИНТЕРНЕТЕ | КРУТАЯ СХЕМА | FUNPAY
-
06:43

Как ЗАРАБОТАТЬ ШКОЛЬНИКУ в ИНТЕРНЕТЕ? Самые Легкие Способы Заработка
-
14:53

Показываю Как Зарабатывать Деньги - Заработок В Интернете 2023 Рабочая Схема Для Заработка
-
14:12

Большой Заработок В Интернете С Выводом Рабочая Схема Заработка
 Загрузка...