

Access to Altium Develop Free Trial - https://www.altium.com/yt/taste_the_code
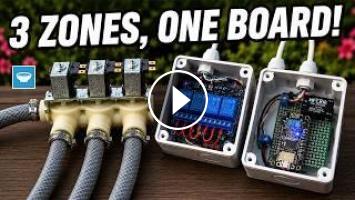
My DIY irrigation controller ran flawlessly for three years on ESPHome, but my garden outgrew it. After splitting the drip irrigation system into three zones, a single valve could no longer deliver enough water pressure to the higher parts of the yard. In this video, I upgrade the controller to drive a three-way washing machine valve using an optically isolated four-channel relay board and a NodeMCU ESP8266. I also switch the firmware from ESPHome to Tasmota so each zone can be watered independently.
You will see how to tear down an existing controller and rewire it for multiple relays, why an optically isolated relay board removes the need for a transistor switching circuit, and which NodeMCU pins (D1, D2, D6) are safe to use for relays so they do not trigger at boot. I cover flashing Tasmota on an ESP8266, configuring a Generic module with inverted relays, and setting up ADC temperature on the analog pin for an NTC thermistor probe. There is also an important note on working with 220V mains voltage and a safer 12V DC valve alternative if you want to replicate this smart irrigation build.
Support my work on Patreon so I can continue producing free content and tutorials!
https://www.patreon.com/taste_the_code
Links and Resources
NodeMCU ESP8266 Board: https://s.click.aliexpress.com/e/_c4PZVB9L
NodeMCU ESP32 Board: https://s.click.aliexpress.com/e/_c3J4jFs1
4-Channel Optically Isolated Relay Board: https://s.click.aliexpress.com/e/_c4S60ke1
3-Way Washing Machine Solenoid Valve: https://s.click.aliexpress.com/e/_c4oeAkA1
NTC Thermistor Probe: https://s.click.aliexpress.com/e/_c2ulFNZF
Cable Glands: https://s.click.aliexpress.com/e/_c3npQogd
Previous Video (HC-SR04 Ultrasonic Sensor with Tasmota on NodeMCU): https://youtu.be/9simFNsFohA
Tasmota Firmware: https://tasmota.github.io/docs/
Written Article:
https://www.tastethecode.com/diy-multi-zone-drip-irrigation-with-tasmota-and-an-isolated-relay-board
Instructable: https://www.instructables.com/Tasmota-Irrigation-Controller-Build-With-a-NodeMCU/
My recording gear:
Canon M50 Mark ii - https://s.click.aliexpress.com/e/_msvmkJ0
GT10 Pro 5G Android Phone - https://s.click.aliexpress.com/e/_oDnXmQm
Dragon Touch 4K Action Camera - https://s.click.aliexpress.com/e/_mrcbfIa
USB Condenser Microphone - https://s.click.aliexpress.com/e/_mq9STfG
Tripod - https://s.click.aliexpress.com/e/_Eynn5TP
Phone tripod mount - https://s.click.aliexpress.com/e/_oDTOzCe
DIY 3-Zone Smart Irrigation with Tasmota and a Washing Machine Valve
#Tasmota #irrigation #ESP8266 #NodeMCU #homeautomation #smartgarden #DIYelectronics #relay #dripirrigation #smarthome #automation #maker #gardentech #ESPHome #TasteTheCode
Main Site and blog: https://www.tastethecode.com
Facebook: https://www.facebook.com/tastethecode/
Instagram: https://www.instagram.com/taste_the_code/
Twitter: http://twitter.com/taste_the_code
Timestamps:
00:00 Introduction
00:51 Why One Zone Was Not Enough
01:40 Altium Develop
02:41 The Optically Isolated Relay Board
03:11 Mains Voltage Warning and 12V Alternative
05:40 Removing the Old Relay Circuit
08:04 Wiring the New Signal Cable
09:14 Safe NodeMCU Pins: D1, D2, D6
13:38 Installing and Configuring Tasmota
15:51 Installing It in the Backyard
17:12 Testing All Three Zones
18:34 Final Thoughts
PCBWay Services - https://pcbway.com/g/7Mb2rj
Access to Altium Develop Free Trial - https://www.altium.com/yt/taste_the_code
My DIY irrigation controller ran flawlessly for three years on ESPHome, but my garden outgrew it. After splitting the drip irrigation system into three zones, a single valve could no longer deliver enough water pressure to the higher parts of the yard. In this video, I upgrade the controller to drive a three-way washing machine valve using an optically isolated four-channel relay board and a NodeMCU ESP8266. I also switch the firmware from ESPHome to Tasmota so each zone can be watered independently.
You will see how to tear down an existing controller and rewire it for multiple relays, why an optically isolated relay board removes the need for a transistor switching circuit, and which NodeMCU pins (D1, D2, D6) are safe to use for relays so they do not trigger at boot. I cover flashing Tasmota on an ESP8266, configuring a Generic module with inverted relays, and setting up ADC temperature on the analog pin for an NTC thermistor probe. There is also an important note on working with 220V mains voltage and a safer 12V DC valve alternative if you want to replicate this smart irrigation build.
Support my work on Patreon so I can continue producing free content and tutorials!
https://www.patreon.com/taste_the_code
Links and Resources
NodeMCU ESP8266 Board: https://s.click.aliexpress.com/e/_c4PZVB9L
NodeMCU ESP32 Board: https://s.click.aliexpress.com/e/_c3J4jFs1
4-Channel Optically Isolated Relay Board: https://s.click.aliexpress.com/e/_c4S60ke1
3-Way Washing Machine Solenoid Valve: https://s.click.aliexpress.com/e/_c4oeAkA1
NTC Thermistor Probe: https://s.click.aliexpress.com/e/_c2ulFNZF
Cable Glands: https://s.click.aliexpress.com/e/_c3npQogd
Previous Video (HC-SR04 Ultrasonic Sensor with Tasmota on NodeMCU): https://youtu.be/9simFNsFohA
Tasmota Firmware: https://tasmota.github.io/docs/
Written Article:
https://www.tastethecode.com/diy-multi-zone-drip-irrigation-with-tasmota-and-an-isolated-relay-board
Instructable: https://www.instructables.com/Tasmota-Irrigation-Controller-Build-With-a-NodeMCU/
My recording gear:
Canon M50 Mark ii - https://s.click.aliexpress.com/e/_msvmkJ0
GT10 Pro 5G Android Phone - https://s.click.aliexpress.com/e/_oDnXmQm
Dragon Touch 4K Action Camera - https://s.click.aliexpress.com/e/_mrcbfIa
USB Condenser Microphone - https://s.click.aliexpress.com/e/_mq9STfG
Tripod - https://s.click.aliexpress.com/e/_Eynn5TP
Phone tripod mount - https://s.click.aliexpress.com/e/_oDTOzCe
DIY 3-Zone Smart Irrigation with Tasmota and a Washing Machine Valve
#Tasmota #irrigation #ESP8266 #NodeMCU #homeautomation #smartgarden #DIYelectronics #relay #dripirrigation #smarthome #automation #maker #gardentech #ESPHome #TasteTheCode
Main Site and blog: https://www.tastethecode.com
Facebook: https://www.facebook.com/tastethecode/
Instagram: https://www.instagram.com/taste_the_code/
Twitter: http://twitter.com/taste_the_code
Timestamps:
00:00 Introduction
00:51 Why One Zone Was Not Enough
01:40 Altium Develop
02:41 The Optically Isolated Relay Board
03:11 Mains Voltage Warning and 12V Alternative
05:40 Removing the Old Relay Circuit
08:04 Wiring the New Signal Cable
09:14 Safe NodeMCU Pins: D1, D2, D6
13:38 Installing and Configuring Tasmota
15:51 Installing It in the Backyard
17:12 Testing All Three Zones
18:34 Final Thoughts
PCBWay Services - https://pcbway.com/g/7Mb2rj
Access to Altium Develop Free Trial - https://www.altium.com/yt/taste_the_code
- Категория
- Схемы по заработку в интернете

Комментариев нет.
Следующее
Auto
-
02:52

How to Find the Coolant Bypass Valve Fuse on Ram 1500, 2500, 3500 (2013-2018)
-
1:12:41
BuildASoil: 10x10 Series // Season 9 Episode 3 BlueMat Setup & Irrigation Automation
-
00:32
Diy mini tractor video mini water pump science project machine #ytshorts #cartoon #tractor #diy
-
00:34
Diy mini tractor video mini water pump science project machine #ytshorts #cartoon #tractor
-
07:41
ACEBOTT QD001 Smart Car Tutorial | Section 1-2 Who is Driving the Smart Car | ESP32 and ACECode
-
12:54
Stop Washing Your Car with Rinseless Wash! | Use It for This Instead
-
00:04
Insane Tile Cutting Machine #Construction #DIY #OddlySatisfying
-
07:58
The Best ONLINE Pressure Washing Training Program to Start Your Business
-
29:46
What Banks See in a Supply and Demand Zone And You Don't (Full Strategy)
-
00:11
LIC Smart Pension 879 plan | Smart pension #pension
-
05:33

ЗАРАБОТОК В ИНТЕРНЕТЕ | КРУТАЯ СХЕМА | FUNPAY
-
08:12

Пассивный Заработок 1000Р в День в Интернете на Телефоне Без Вложений
-
06:43

Как ЗАРАБОТАТЬ ШКОЛЬНИКУ в ИНТЕРНЕТЕ? Самые Легкие Способы Заработка
-
07:05

ЗАРАБОТОК В ИНТЕРНЕТЕ 2023 | Реальный заработок в интернете с вложением | Как заработать в интернете
-
05:49

ЗАРАБОТОК В ИНТЕРНЕТЕ 2023 | Реальный Заработок В Интернете С Вложением. Как Заработать В Интернете?
-
04:28

Схема заработка 2023 ! Зарабатываем в интернете онлайн сидя дома ! Заработок денег ! Деньги легко !
-
05:33

ЗАРАБОТОК В ИНТЕРНЕТЕ | КРУТАЯ СХЕМА | FUNPAY
-
06:43

Как ЗАРАБОТАТЬ ШКОЛЬНИКУ в ИНТЕРНЕТЕ? Самые Легкие Способы Заработка
-
14:53

Показываю Как Зарабатывать Деньги - Заработок В Интернете 2023 Рабочая Схема Для Заработка
-
14:12

Большой Заработок В Интернете С Выводом Рабочая Схема Заработка
 Загрузка...